Connecting a Redshift Warehouse
- 28 Apr 2023
- 2 Minutes to read
- Print
- DarkLight
- PDF
Connecting a Redshift Warehouse
- Updated on 28 Apr 2023
- 2 Minutes to read
- Print
- DarkLight
- PDF
Article summary
Did you find this summary helpful?
Thank you for your feedback!
Redshift
Connecting Precog
Precog uses AWS S3 buckets in order to load data to your Panoply account. You will need to have a S3 bucket and its access key and secret available.
- In the Panoply navigation menu, click BI Connection. This displays your Panoply data warehouse's connection details.
- Copy your database name and username.
- Sign into your Precog account.
- Click the Destinations.
- Search for Panoply Redshift.
- Click the Panoply icon.
- Name the destination.
- Enter your AWS S3 bucket name, access and secret keys and the bucket region
- Enter the JDBC connection URL (replace
dbnamewith your Panoply account name):jdbc:redshift://db.panoply.io:5439/dbname. - Enter the destination schema.
- Enter your Panoply username and password.
- Select Keys as the authorization type.
- Re-enter your AWS access key, secret and the bucket's region.
- Click on Add.
- Select which tables you wish to connect to this destination.
Connecting Stitch
- In the Panoply navigation menu, click BI Connection. This displays your Panoply data warehouse's connection details.
- Copy your host, port, database name, and user name.
- Sign into your Stitch account.
- Head to the destination tab and click the Panoply icon.
- When prompted, enter the information you collected from the Panoply BI Connection section into the corresponding fields in Stitch:
- Host (Endpoint): The host name you received from Panoply (
db.panoply.io) - Port: The port number you received from Panoply (
5439) - Username: The user name you set for your Panoply account
- Password: The password you use to log into Panoply
- Database: The name of the Panoply database to load data into (be sure to specify the correct database name if you have multiple databases attached to your account)
- Host (Endpoint): The host name you received from Panoply (
Connecting Fivetran
- In the Panoply navigation menu, click BI Connection. This displays your Panoply data warehouse's connection details.
- Copy your host, database name, and user name.
- Sign into your Fivetran account.
- Pause all integrations in the Fivetran dashboard.
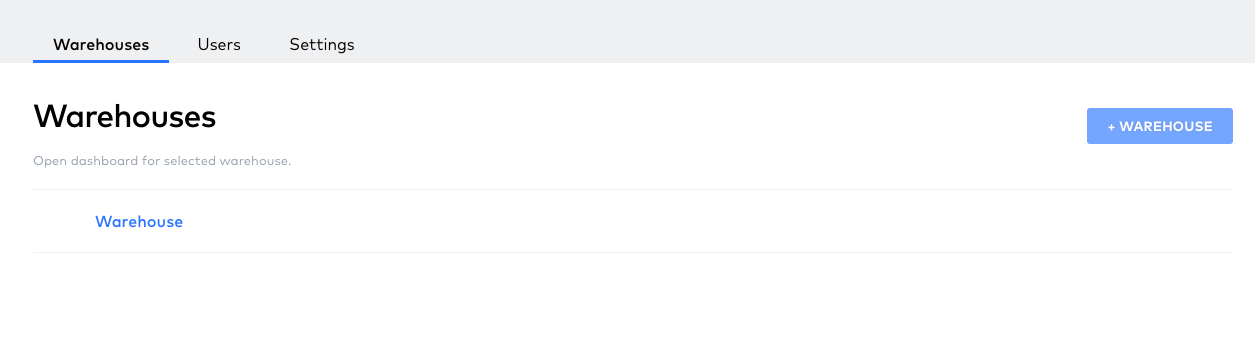
- Login to your account page, navigate to your account and click the +WAREHOUSE button.
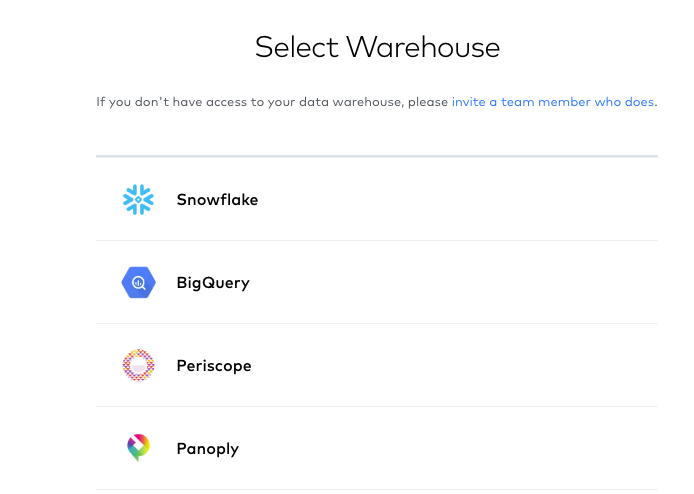
- Under Select Warehouse, scroll down until you find Panoply.
- Fivetran will automatically add Panoply's Port information, but you will need to enter Panoply's Host name (
db.panoply.io), your Panoply User namme, the password associated with your Panoply account, and the Database you want to use Fivetran to load data into.
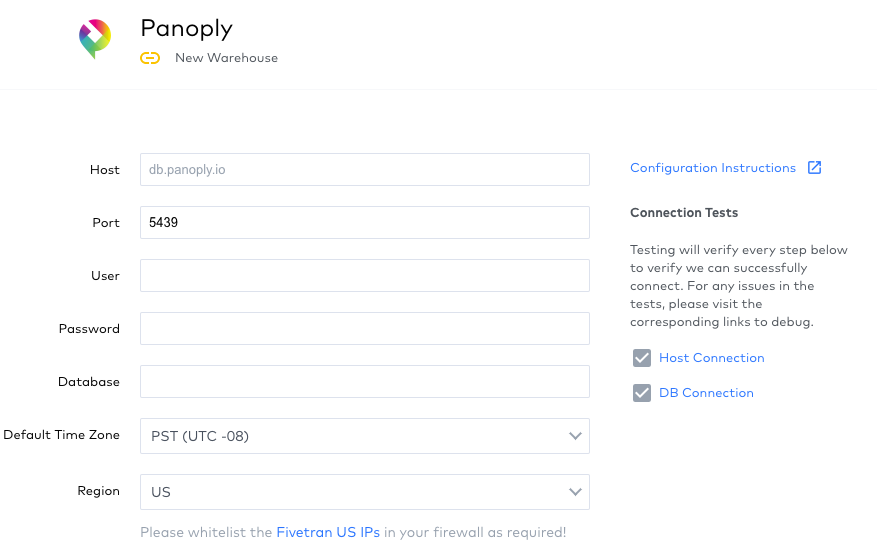
- Click SAVE & TEST at the bottom of the screen. When the test is successful, a box at the bottom of the screen says "All connection tests passesd!"
- Click VIEW WAREHOUSE. You should see the details of your Panoply warehouse in the next page. You can now load data into Panoply using Fivetran.
Was this article helpful?
.png)